Exporting Data from FaceBase
On this page:
1. Export Options
Available data files displayed on a page may be downloaded individually by clicking the link (indicated by the download icon):
![]()
The “Export” button offers other options:
- search results (csv): Available on every search or detail page, this option downloads a CSV file of the metadata displayed for the search results or detail page. For search results, it will include metadata for all of the results, not just those visible on the current page.
- BAG: Available on all detail pages, clicking this option downloads a file with metadata and information about the files that are used with our tool (see below) to export the files to your desired location (locally or on a remote server). This is recommended for many files or very large files.
To use the “BAG” option, follow the instructions on the rest of the page.
2. Export the BAG
2.1 What is a BAG?
BDBAG (Big Data Bag) is a program that allows for reliable transfer of a “bag” of digital content - in this context, a group of files that you want to export in bulk. It is available as a GUI client and a command-line client.
A BAG consists of a hierarchical directory containing the data files and other accompanying metadata files that enable and document the secure transfer of the BAG to your chosen location. This provides verification that you have all the files you were trying to export AND that they were not corrupted in the process.
2.2 Create the BAG
To create the initial “BAG”, you will need a FaceBase account. If you have not already done so, please click this link or the “Sign Up” link in the upper right corner of the navigation menu. Then choose your method of login (ie, institutional credentials, Google, username/password, etc.) and follow the prompts. The Hub must approve your request before your account becomes active.
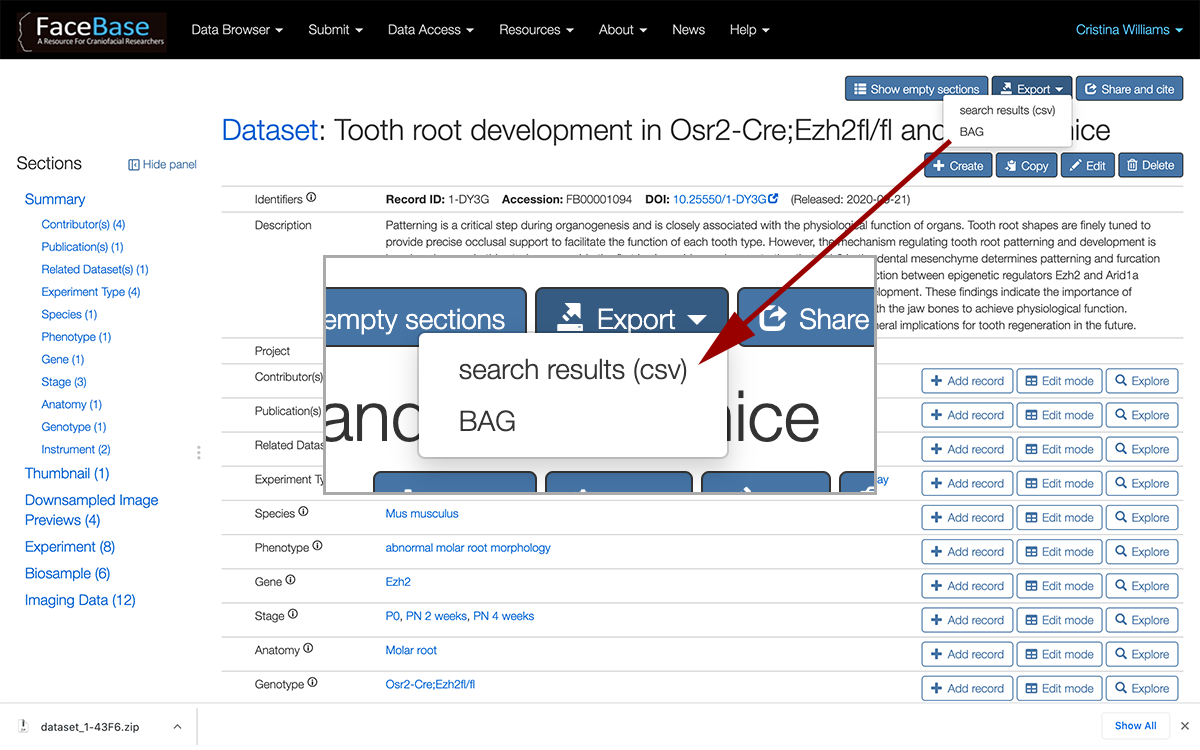
Go to the detail page with the data you want, click the Export button towards the upper right part of the screen and choose BAG.
We’ll use this study as an example: https://www.facebase.org/chaise/record/#1/isa:dataset/RID=1-DY3G
After you click BAG, a progress window appears saying that the BAG is being created.
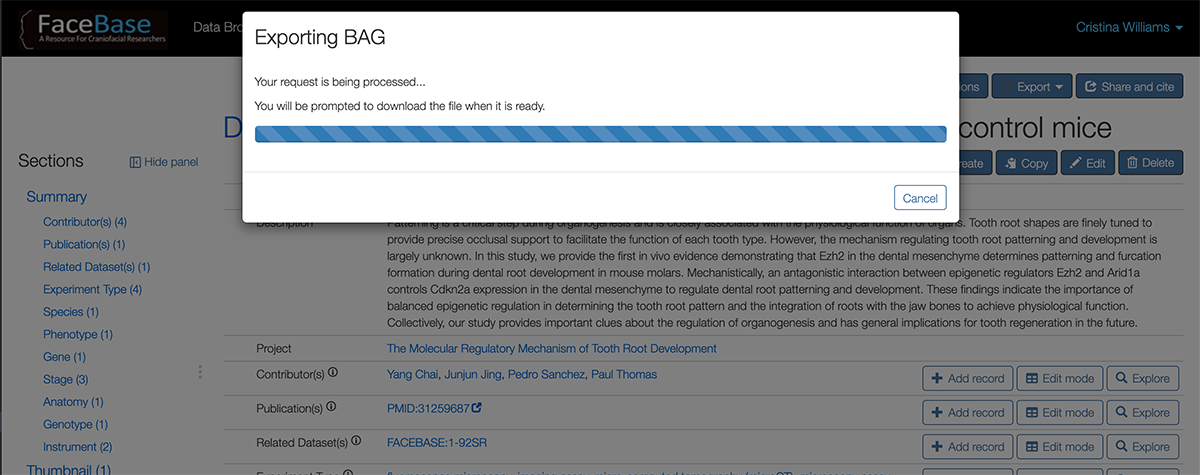
A ZIP file downloads to your local environment with the metadata files describing the data (including appropriate MD5 checksums), e.g. dataset_1-DY3G.zip. This will not yet include the actual data files themselves.
Make a note of the path to this file.
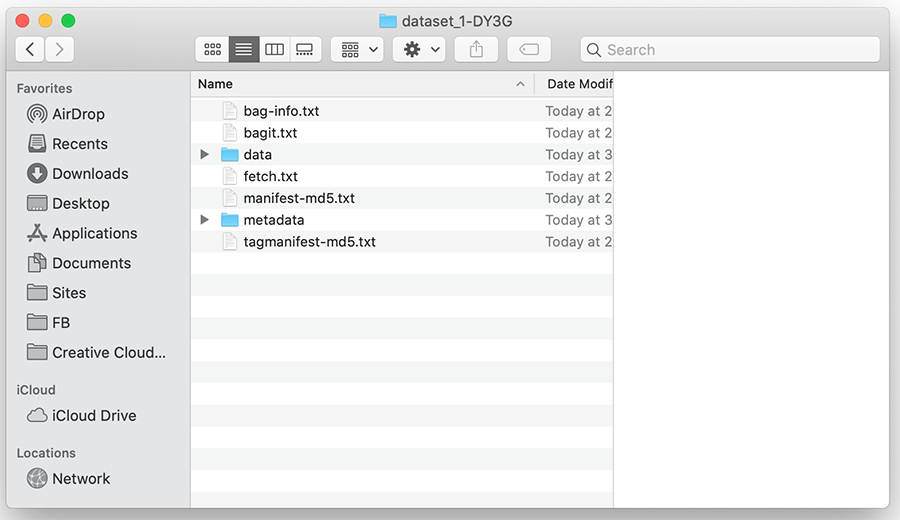
2.3 Contents of a BAG
If you unzip the file, you will see a list of BAG manifest files and folders. The “data” folder contains the exported metadata in the CSV format relevant to the record of your interest, e.g. Dataset.csv, Experiment.csv, etc.
The actual asset files are listed in the BAG manifest and may be downloaded using bdbag commands via the client tools described in the next section.
3. Download the data files
Use the BDBag client in the DERIVA Client Tools to export the files. You have the option of using a GUI for simple transfer of files to your local computer or the command-line client, which offers more options and may be used on a remote server.
If you haven’t already signed up for a FaceBase account (ie, someone else created the BAG with their account and sent it to you), click this link or the “Sign Up” link in the upper right corner of the navigation menu. Then choose your method of login (ie, institutional credentials, Google, username/password, etc.) and follow the prompts. The Hub must approve your request before your account becomes active.
3.1 Download and install DERIVA Client
DERIVA Client is a set of software packages that includes the BDBag command line program (bdbag) and GUI, either of which may be used for downloading the files, and the DERIVA Authentication Agent for authenticating your downloads. (Note that there are other programs within this package that are useful for data submitters, such as the upload program.)
- Windows and Mac users or those who prefer a more “turnkey” installation: installers are available here.
- Linux users: DERIVA Client is built on Python and is available via the command
pip install deriva-client. A Python 3.5.4 or greater system installation is required. The latest stable version of Python is recommended. Detailed installation instructions are available here.
3.2 Using the GUI application
The GUI application is quick and easy to use but has fewer options than the command-line. This is fine if you just want all of the files to a local environment. For use on a remote server or to have full access to exporting options, see 3.3 Using the command line client.
To use the GUI:
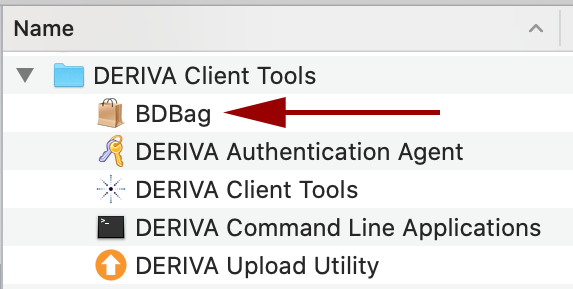
- Go to the application folder where you installed the client tools (The directory name will be “DERIVA Client Tools”). Double-click the icon for BDBag to open it.
- In the Name column, use the arrows to traverse down your system directory to the folder with the BAG you downloaded (ie, your Downloads folder). Select the BAG zip file. The following screenshots provide a demonstration. But keep in mind that if you traverse to a folder with many files, it will take a while to scroll to the BAG file. You may want to save it in a more “shallow” location.
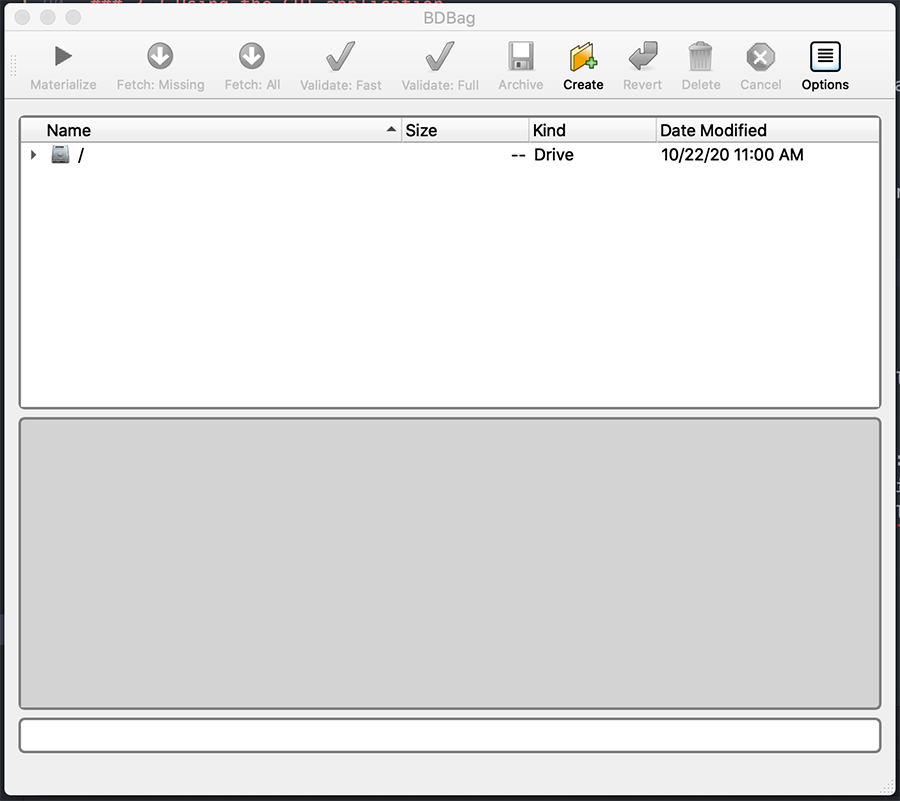
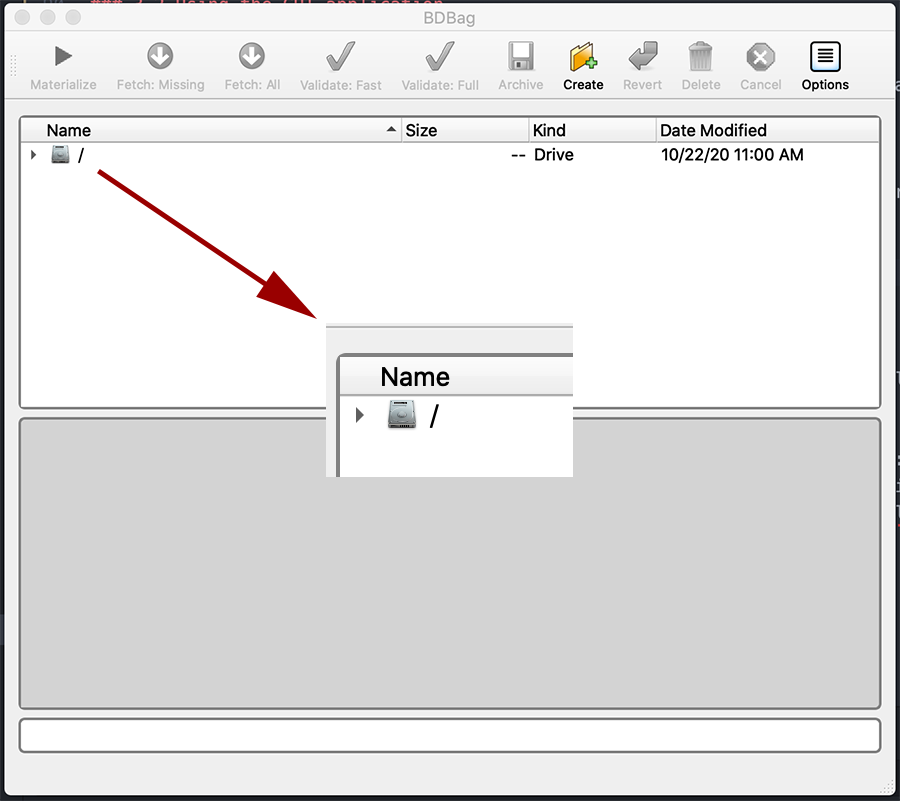
-
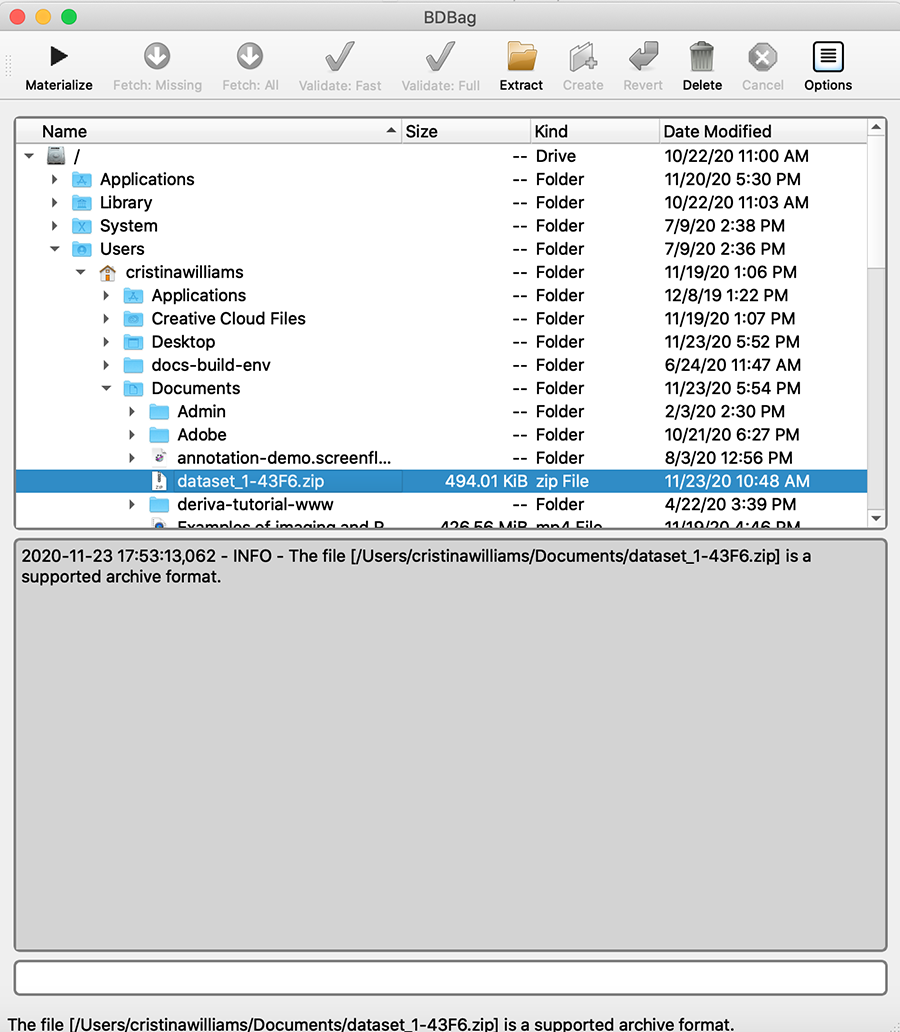
Click Materialize to extract the folder from the zip file, download them to the same folder as the zip file and perform checksum validation to make sure there was no corruption in the transfer. The status field will indicate your progress.
-
Alternatively, you may select Extract to open the ZIP file, then Fetch: All to export all of the files without validation. If you need to validate later, you can click Validate: Fast or Validate: Full (the latter option provides status messages of verification as it occurs).
-
If your transfer was interrupted, click Fetch: Missing to export any files that were not initially transferred.
3.3 Using the command line client
3.3.1 Authenticate with the DERIVA Authentication Agent
In the DERIVA Client Tools directory, open the “DERIVA Authentication Agent” application:
- Windows or Mac: Go to the applications folder, open the “DERIVA Client Tools” folder and double-click the icon for “DERIVA Authentication Agent”.
- Linux: Run
deriva-auth.
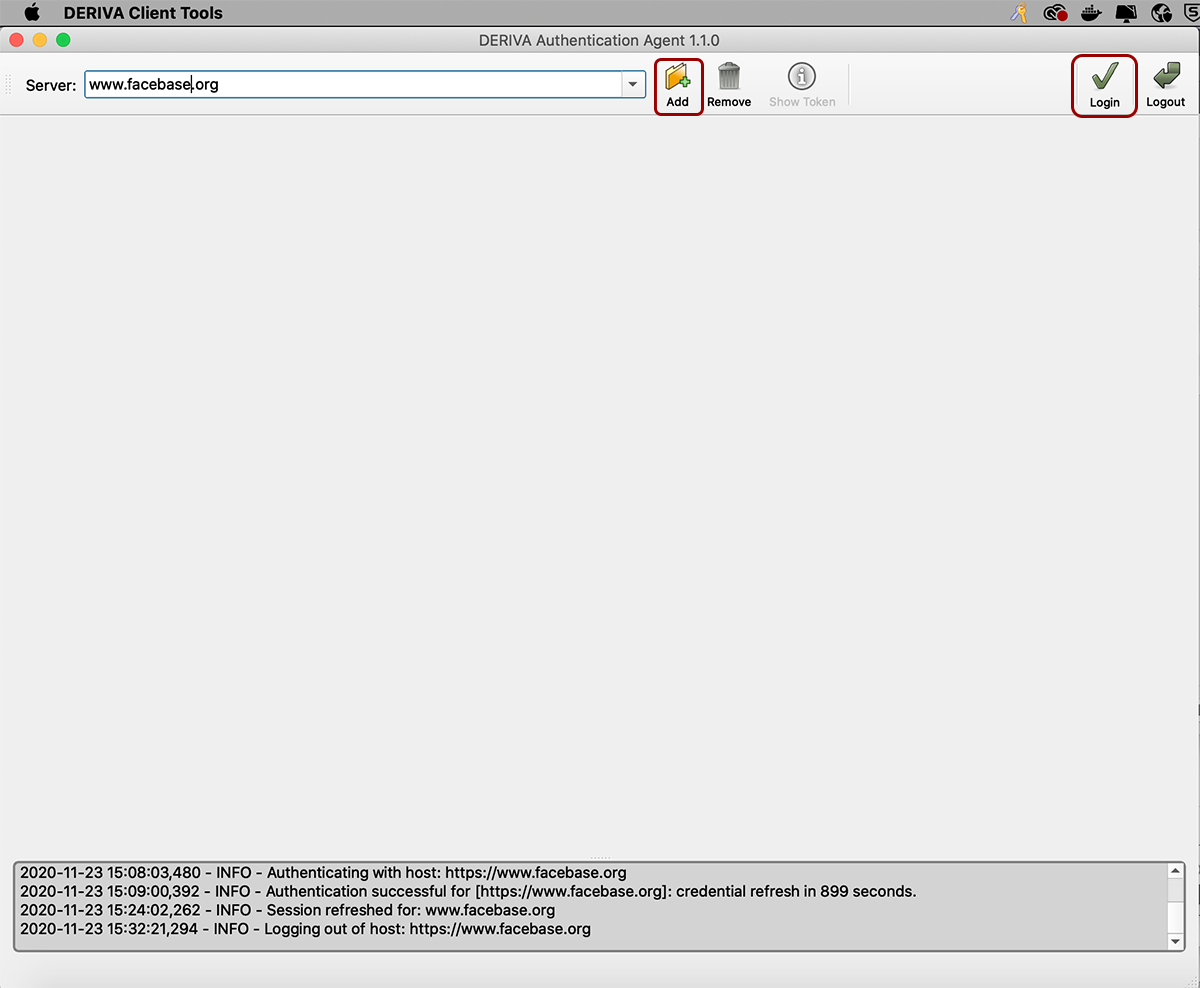
The first time you log in, you’ll see a mostly-empty window:
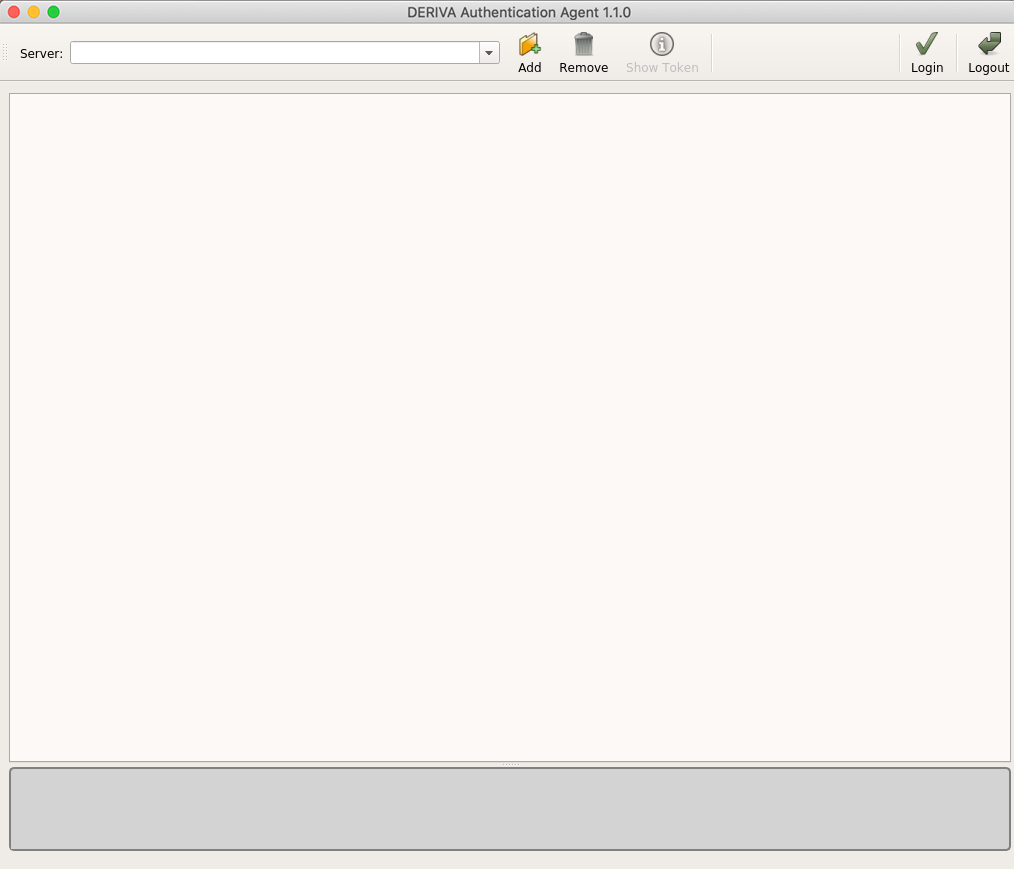
In the “Server:” field, type in www.facebase.org and click the Add or Login buttons.
You should now see the following screen:
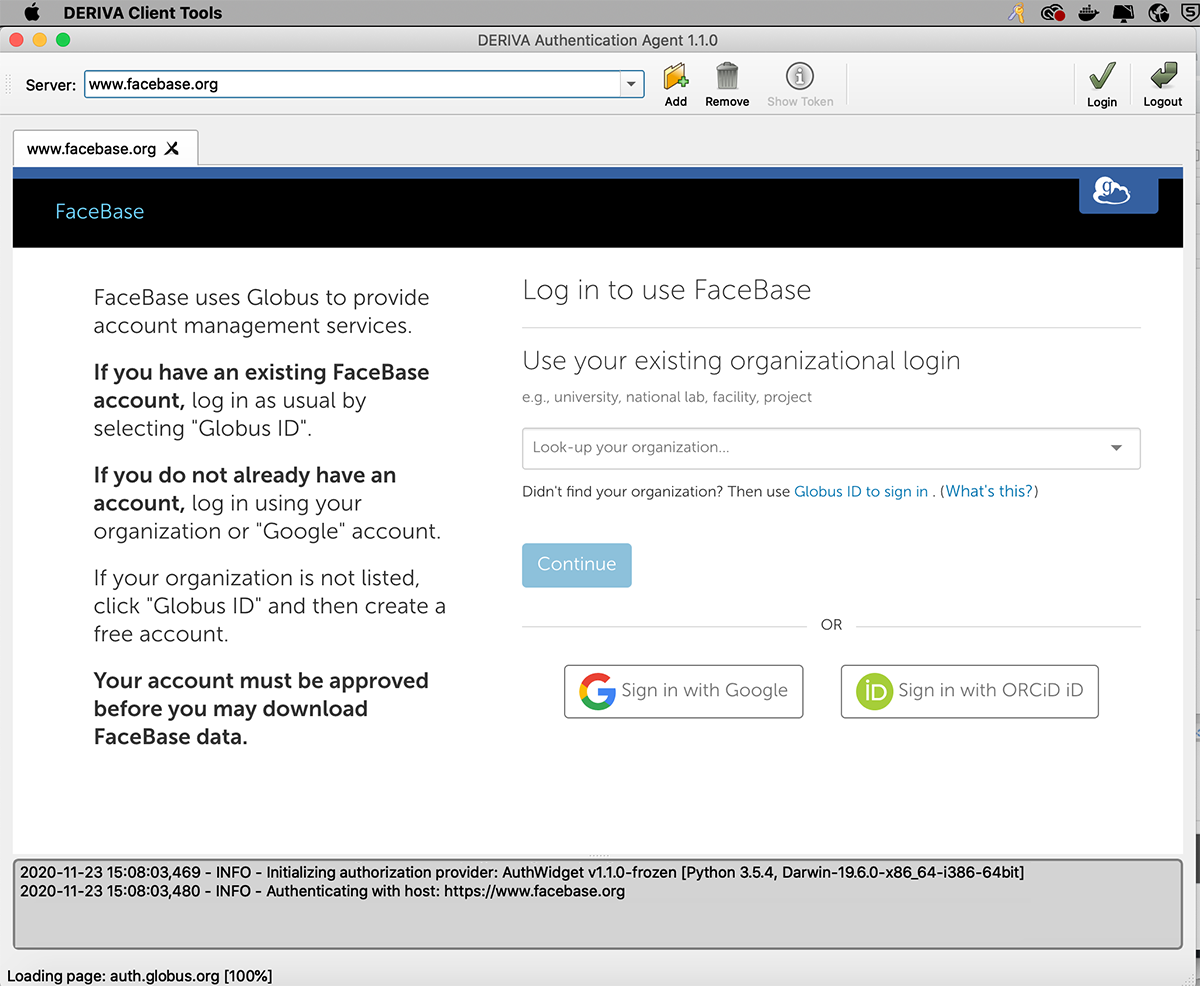
Log in with the credentials you chose when you created your FaceBase account.
After logging in, you’ll see an “Authentication Successful” message.
3.3.2 Download the data files with the bdbag command
The following describe two methods of downloading the data files: to your local computer and to a remote server.
3.3.2.1 Download to your local computer
If you used a Window/Mac installer to install DERIVA Client, go to the “DERIVA Client Tools” folder on your computer and open “DERIVA Command Line Applications”. This will display a special Terminal window to run your BDBag commands.
Run the following command to export (i.e., materialize) the data and download them to the current directory:
bdbag download\path\dataset_1-DY3G.zip --materialize
This program outputs messages as it extracts the bag, looks up the remote addresses of the data files and downloads each file. This program also automatically performs full validation of the files after they have been downloaded.
The downloaded files are located in the folder ./data/asset/ relevant to the current directory.
You may refine the download options further with the following options.
To download only files with a particular file extension (e.g. .fastq.gz)…
bdbag --resolve-fetch all --fetch-filter filename$*fastq.gz download\path\dataset_1-DY3G.zip
To download only the missing files with a particular file extensions (e.g. fastq.gz)…
bdbag --resolve-fetch missing --fetch-filter filename$*fastq.gz "download\path\dataset_1-DY3G"
You would use the option --resolve-fetch missing if your download quit before retrieving all of the files.
To filter and download only files below a specific size…
bdbag --resolve-fetch all --fetch-filter "length<=n" "download\path\dataset_1-DY3G"
where n is the size limit in kilobytes. For example, if you only wanted to download files smaller than 500 MB, the above command would be:
bdbag --resolve-fetch all --fetch-filter "length<=500000" "download\path\dataset_1-DY3G"
You may find the complete list of command line options here:
https://github.com/fair-research/bdbag/blob/master/doc/cli.md#bdbag-command-line-interface-cli
3.3.2.2 Download to a remote cluster/server
If you want to download data files to a remote cluster or server, you will need to install the DERIVA Client tools on the remote environment as well as locally. The following instructions assume you have already installed DERIVA Client locally (as described in 3.1 Download and install DERIVA Client).
A Python 3.5.4 or greater system installation is required to use the client tools. The latest stable version of Python is recommended.
- On the remote cluster/server, install
bdbagusing the following command:pip install bdbag -
On your local computer, log in using DERIVA Auth (as described in 3.3.1 Authenticate with the DERIVA Authentication Agent).
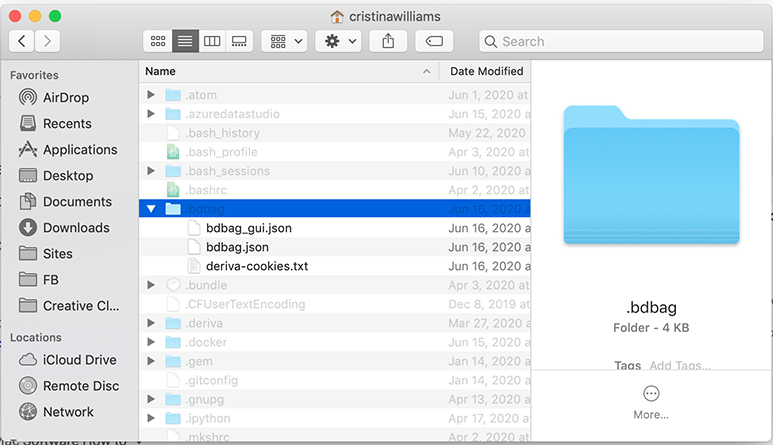
- Under the local folder
/home/username/.bdbag, find thederiva-cookies.txtfile and copy from your local computer to the remote server:
-
Copy the downloaded and unzipped BAG folder (e.g. “dataset_1-DY3G”) to the remote server.
-
SSH to the remote server and run the
bdbagcommands from 3.3.2.1 Download to your local computer.
4. Troubleshooting
4.1 If you used DERIVA Auth but are still getting an error that you are not allowed to download data
Make sure that you logged in to the right server! This is more possible if you are using this procedure on different websites - you want to make sure that you are logging in to the correct website. Make sure to double-check the content of the “Server” field in DERIVA Authentication Agent.
4.2 If your BAG export failed
BDBag keeps track of what files were exported. If the transfer is interrupted, it will re-try several times.
If the transfer completely stops, you can rerun the same command with the option --missing and it will only get the appropriately missing files.
4.3 If you want to verify you received all of the files in the BAG
Re-run your BDBag command with --validate full at the end to confirm the data integrity.